For the complete documentation index, see llms.txt
For the complete documentation index, see llms.txt
How To See Background Check Results for an Employee in Workday HRIS
Here's how to find the results of a Zinc background check for a current employee in Workday, from the overall result to the full report PDF.
Once you've started a check, Workday creates a **Select Background Check Overall Status** task. From there you can see the overview and open the Zinc result using the **Results URL.**
## Finding the Background Check History
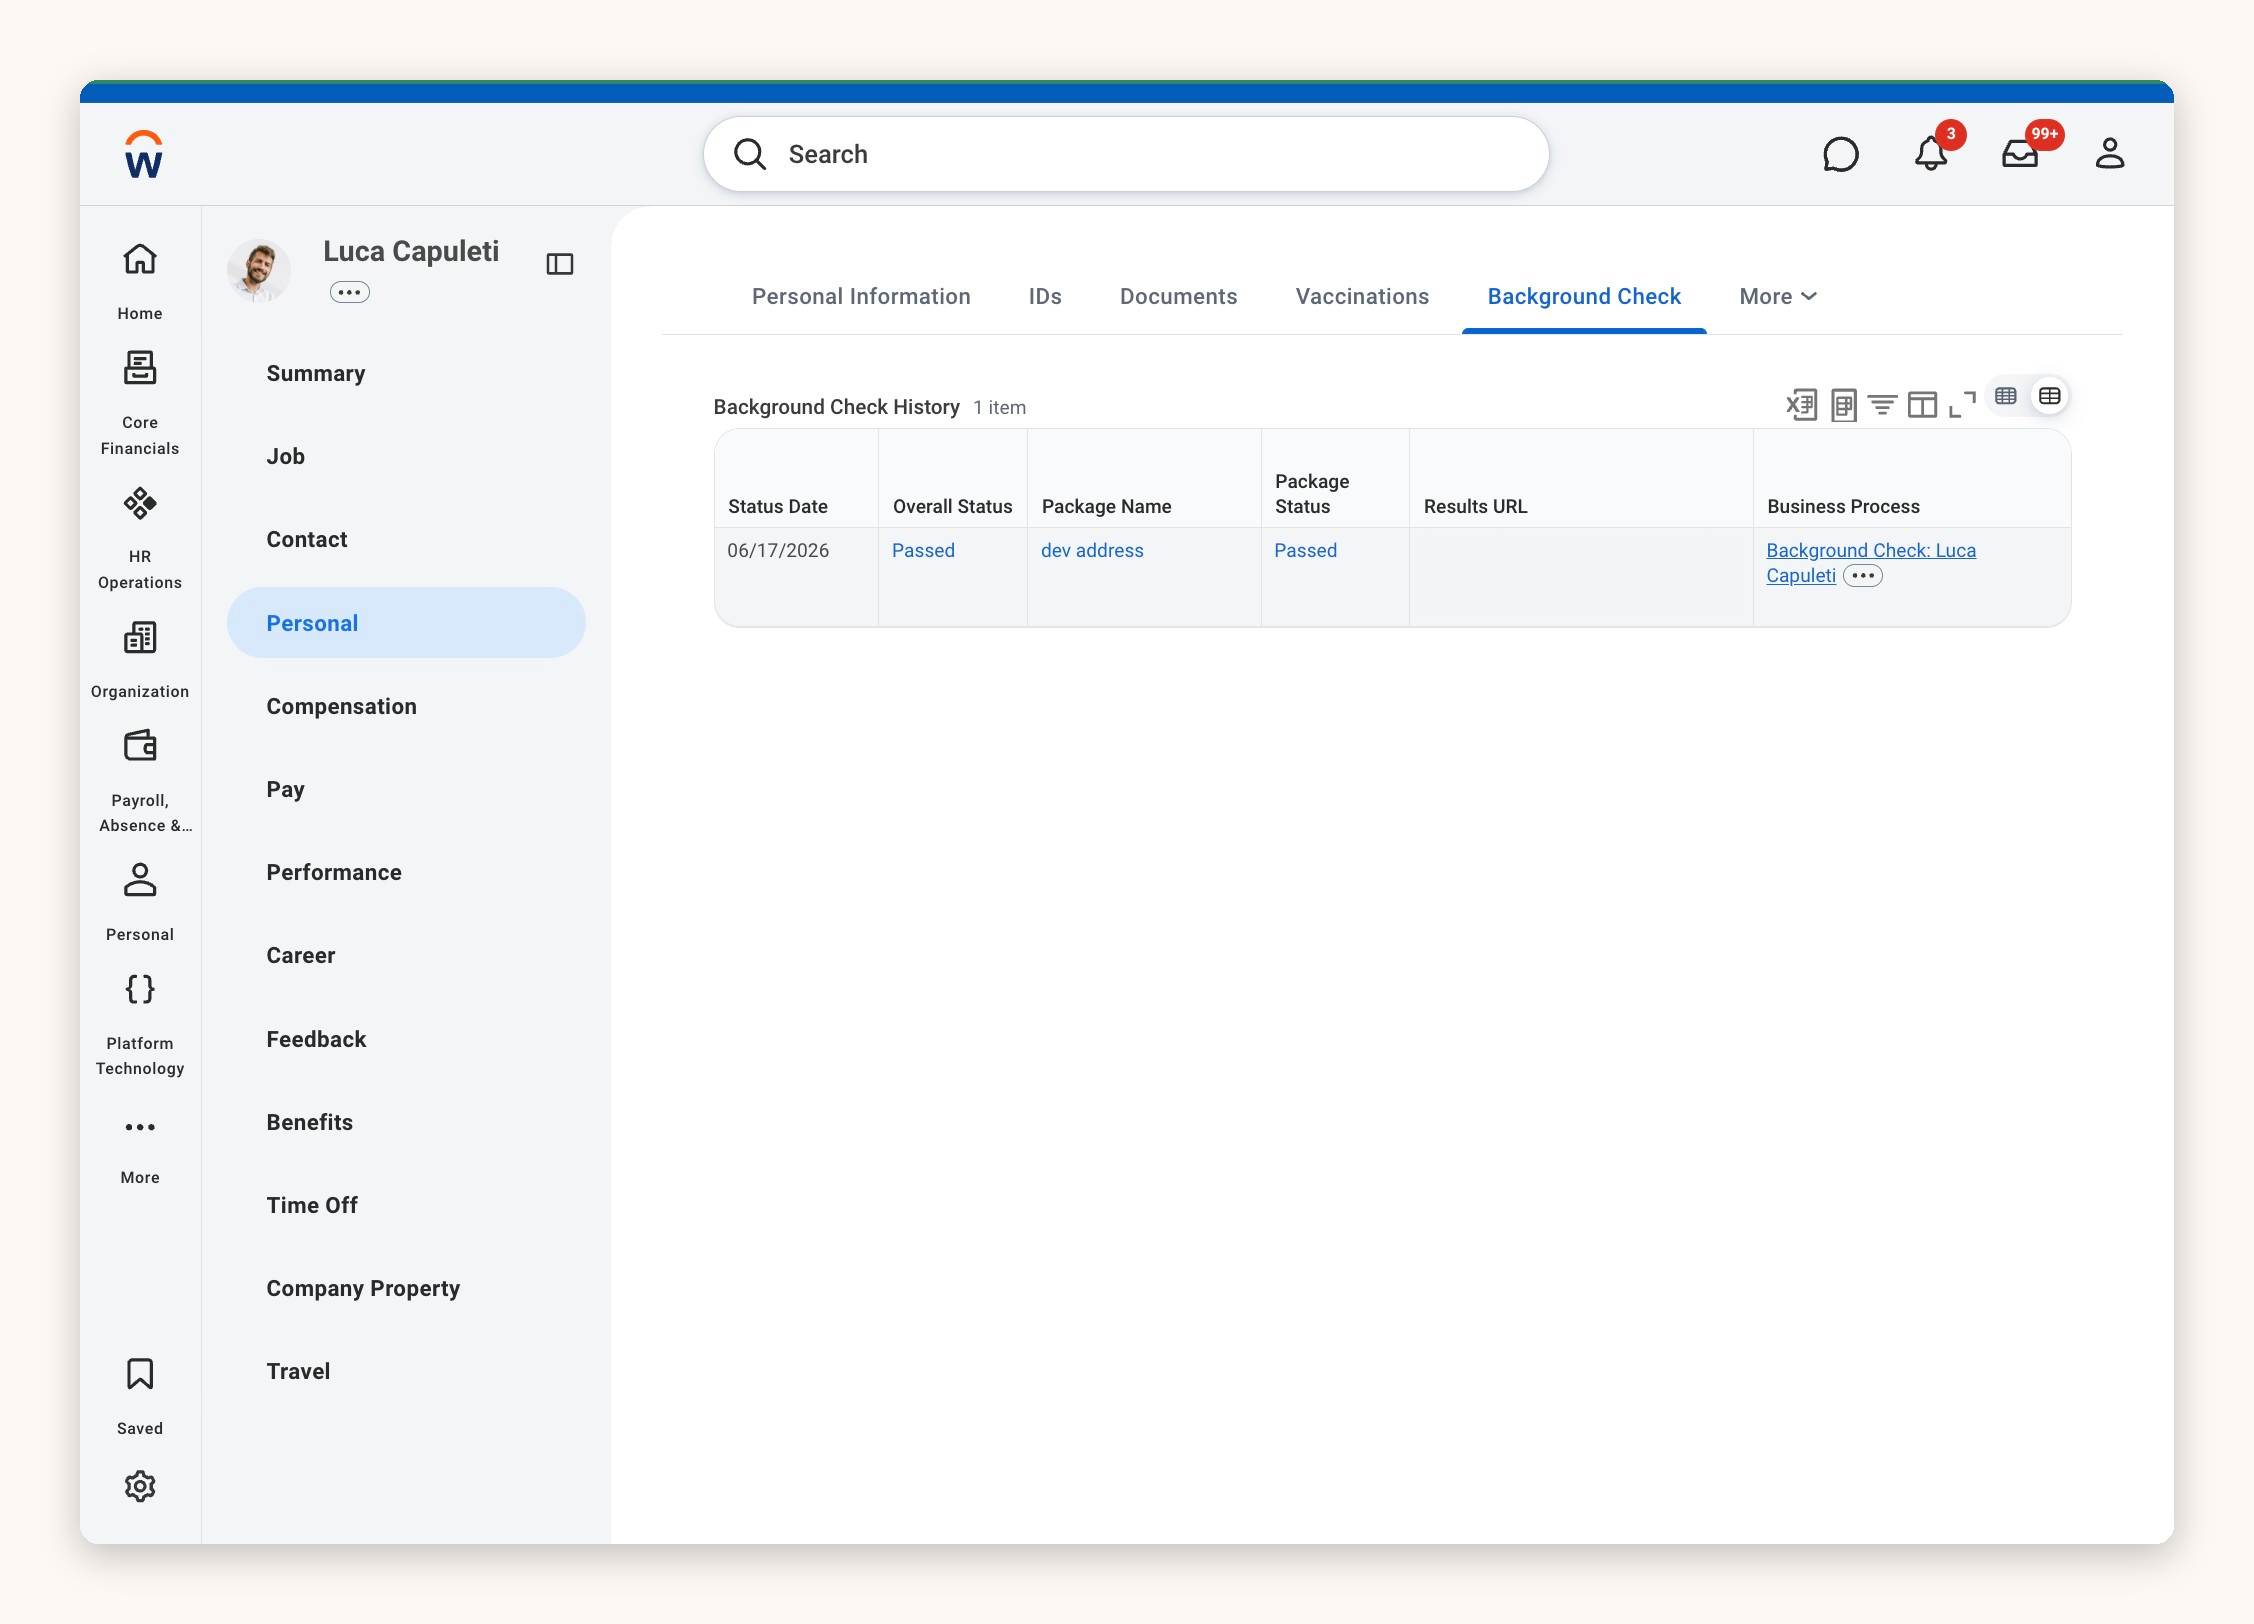
1. Open the employee's profile in Workday.
2. Select **Personal** in the left-hand menu.
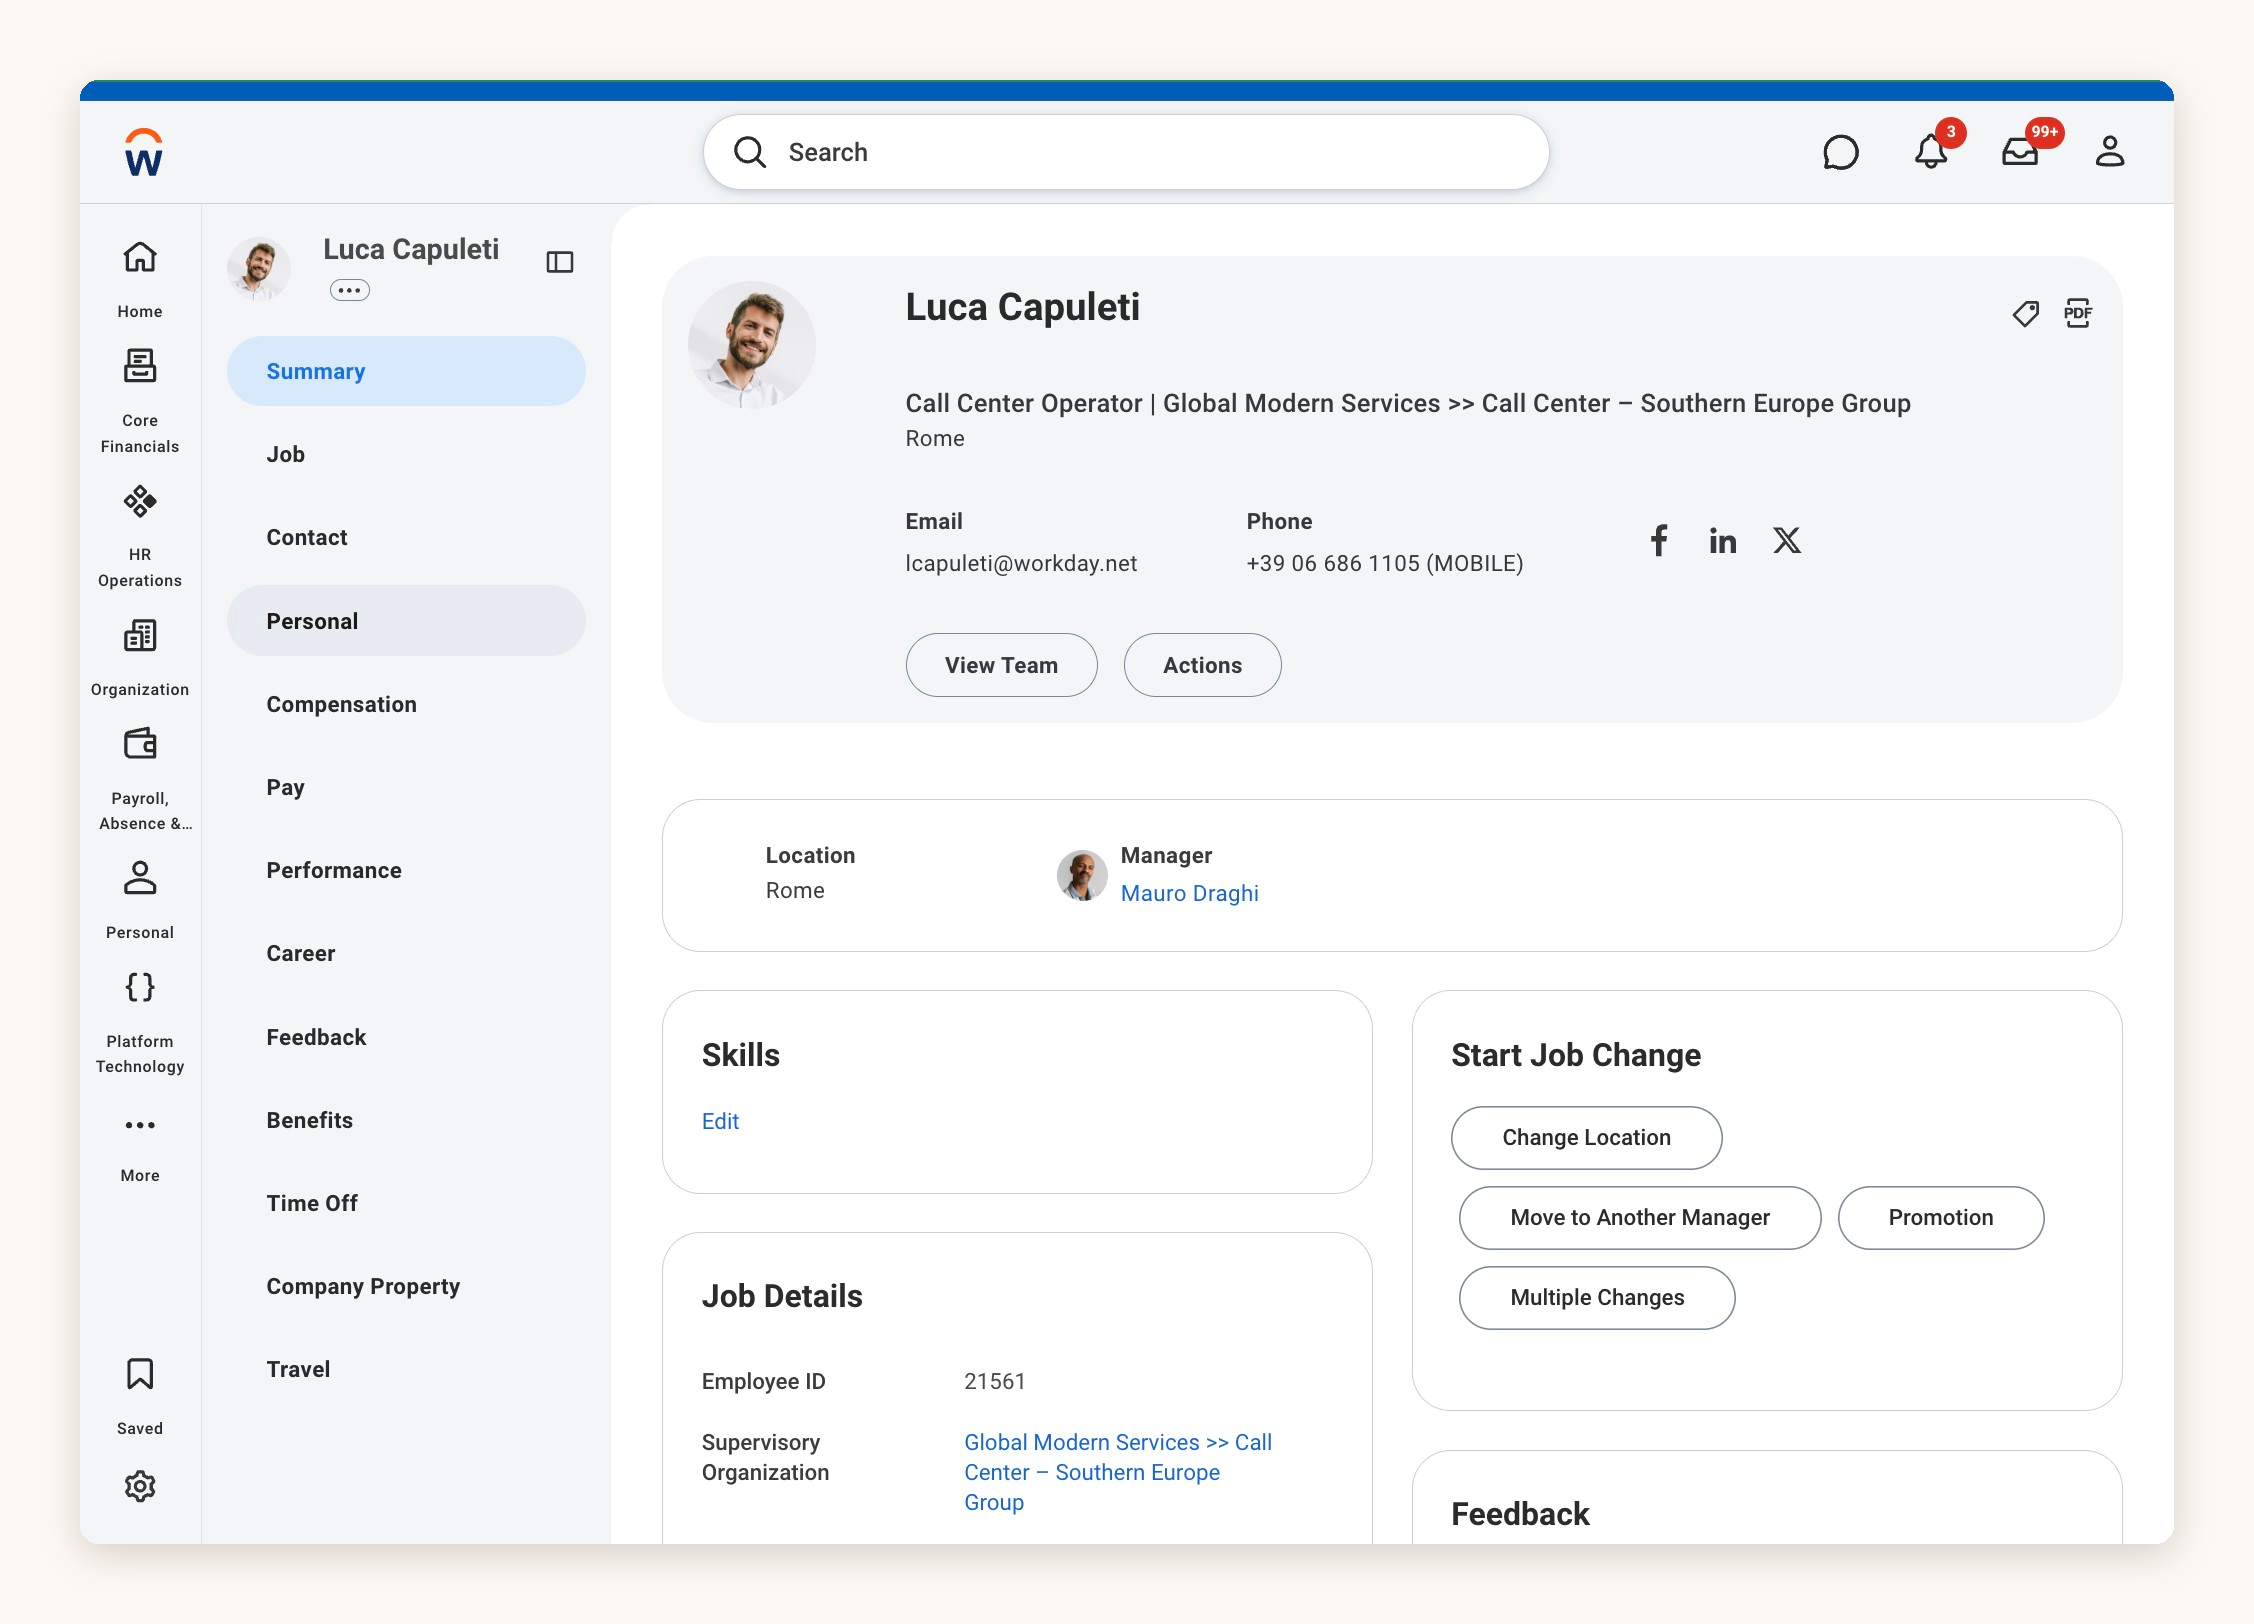
3. Open the **More** menu at the end of the row of tabs.
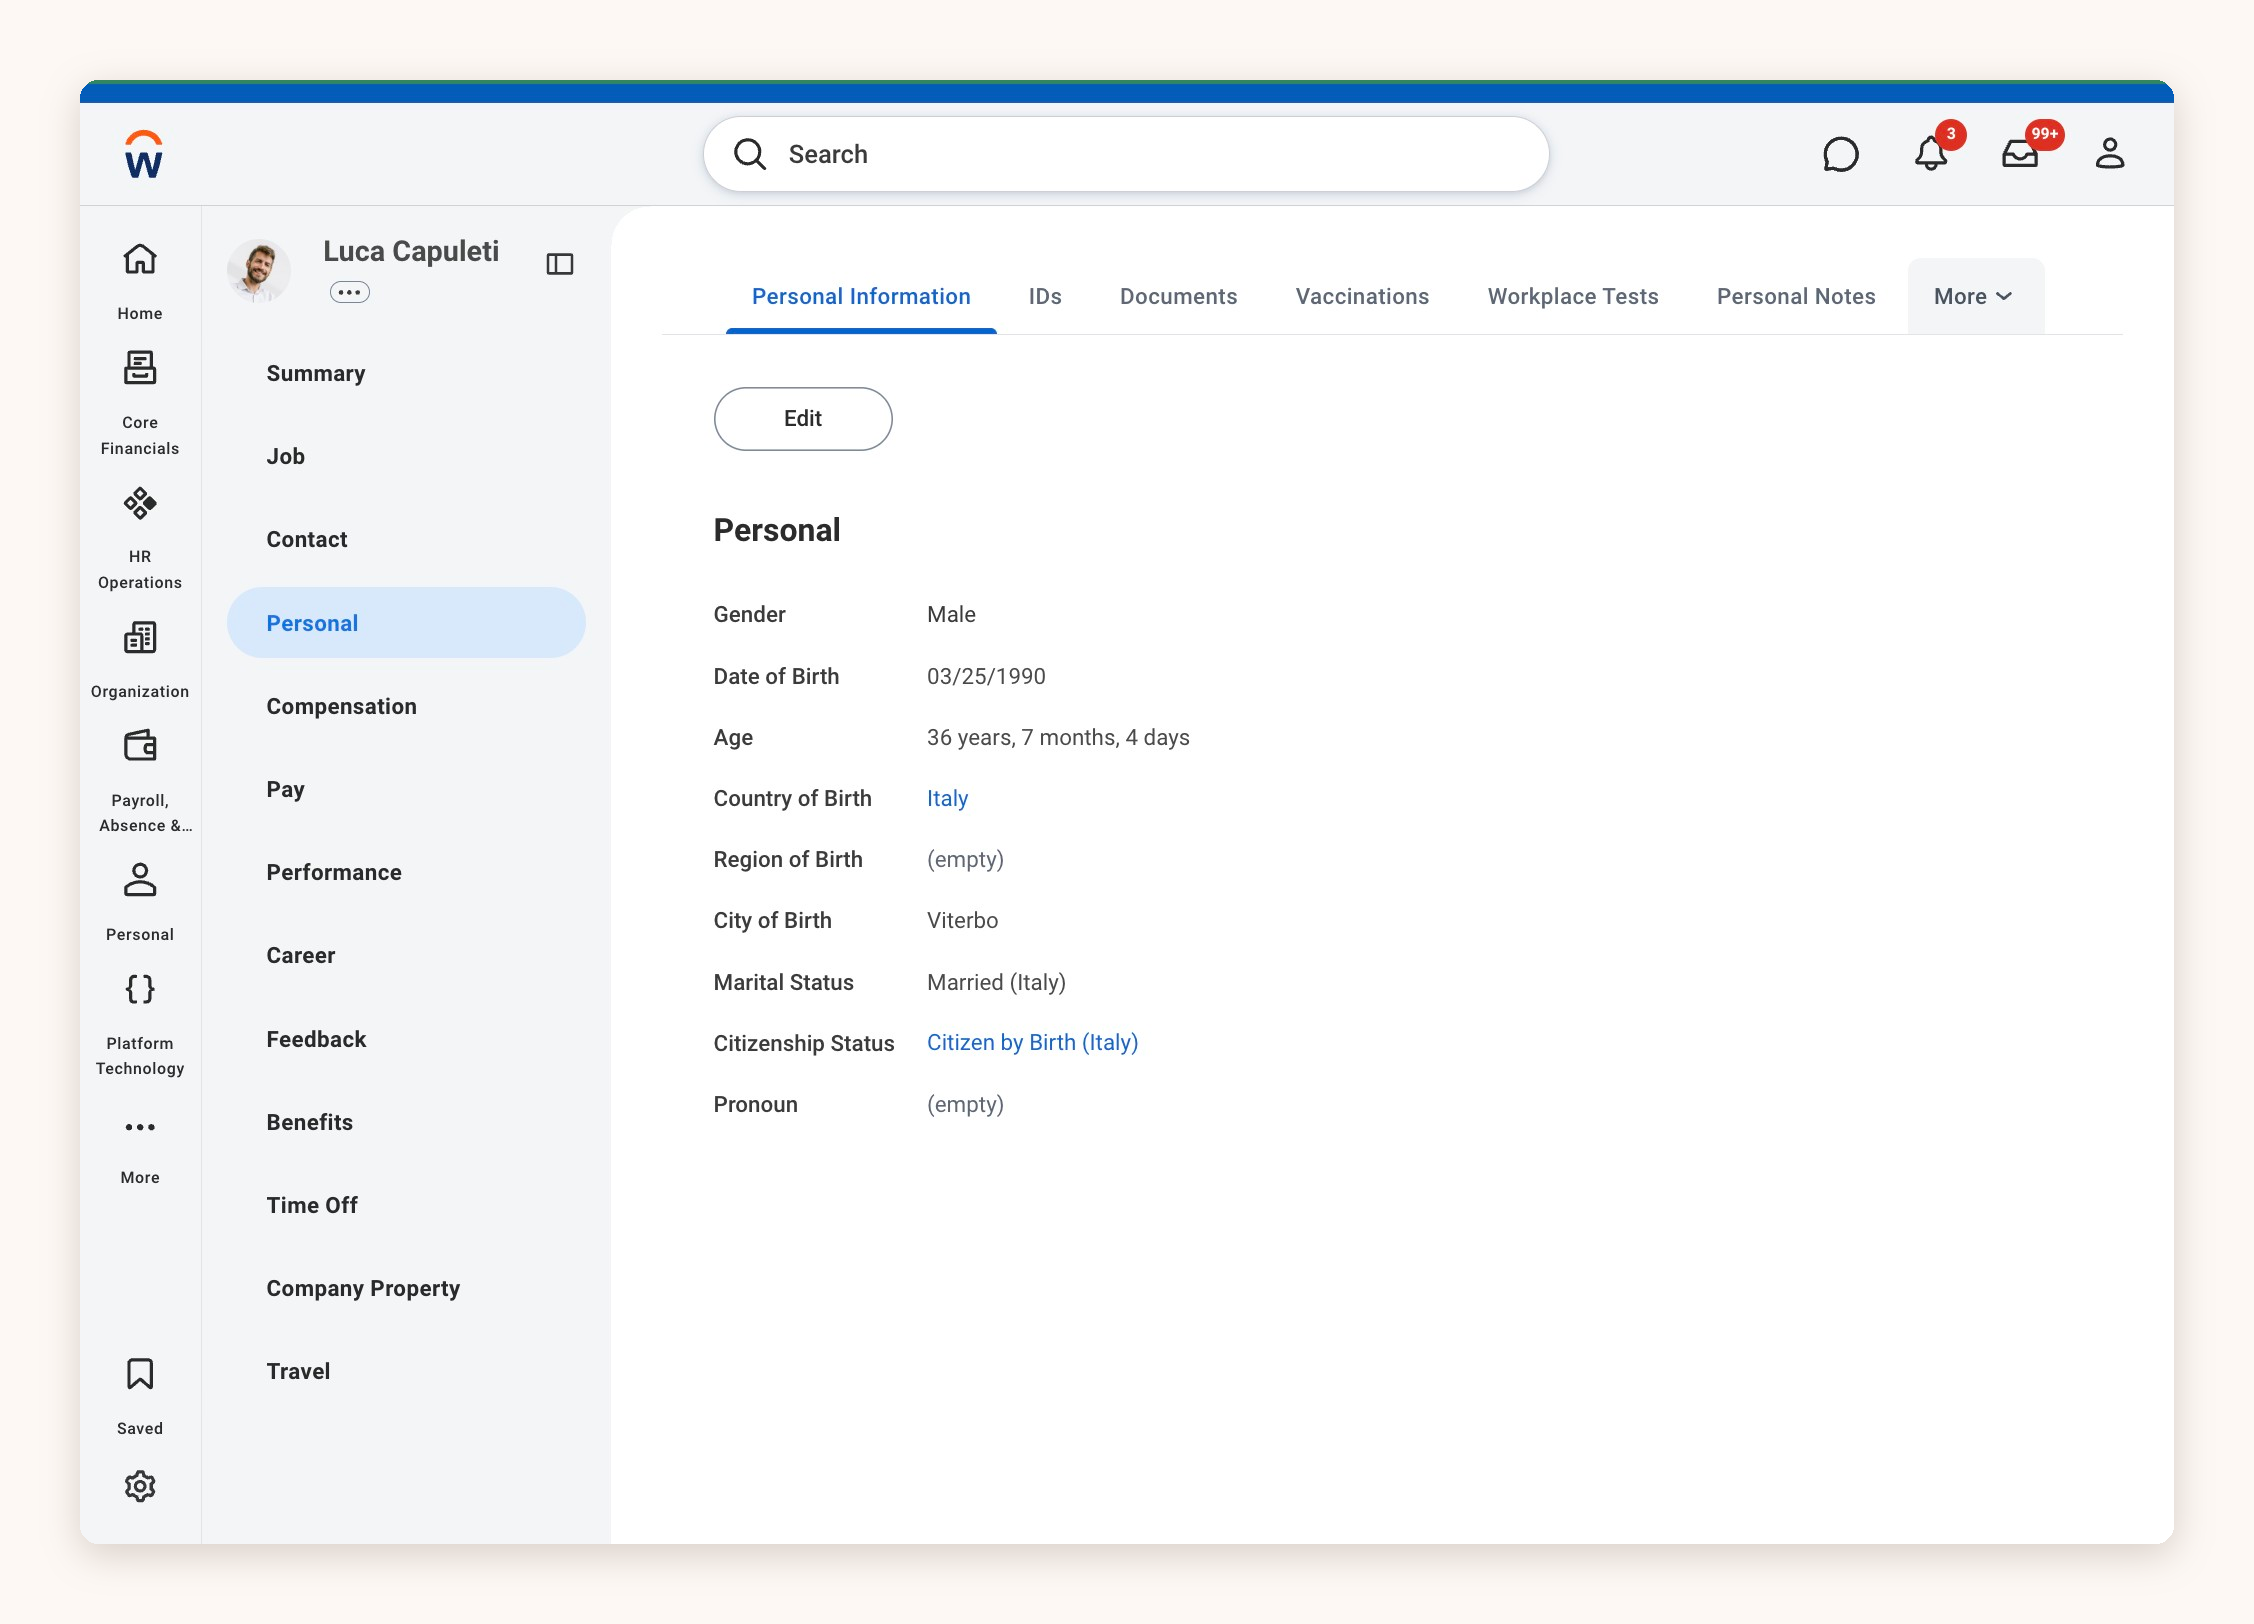
4. Choose **Background Check.**
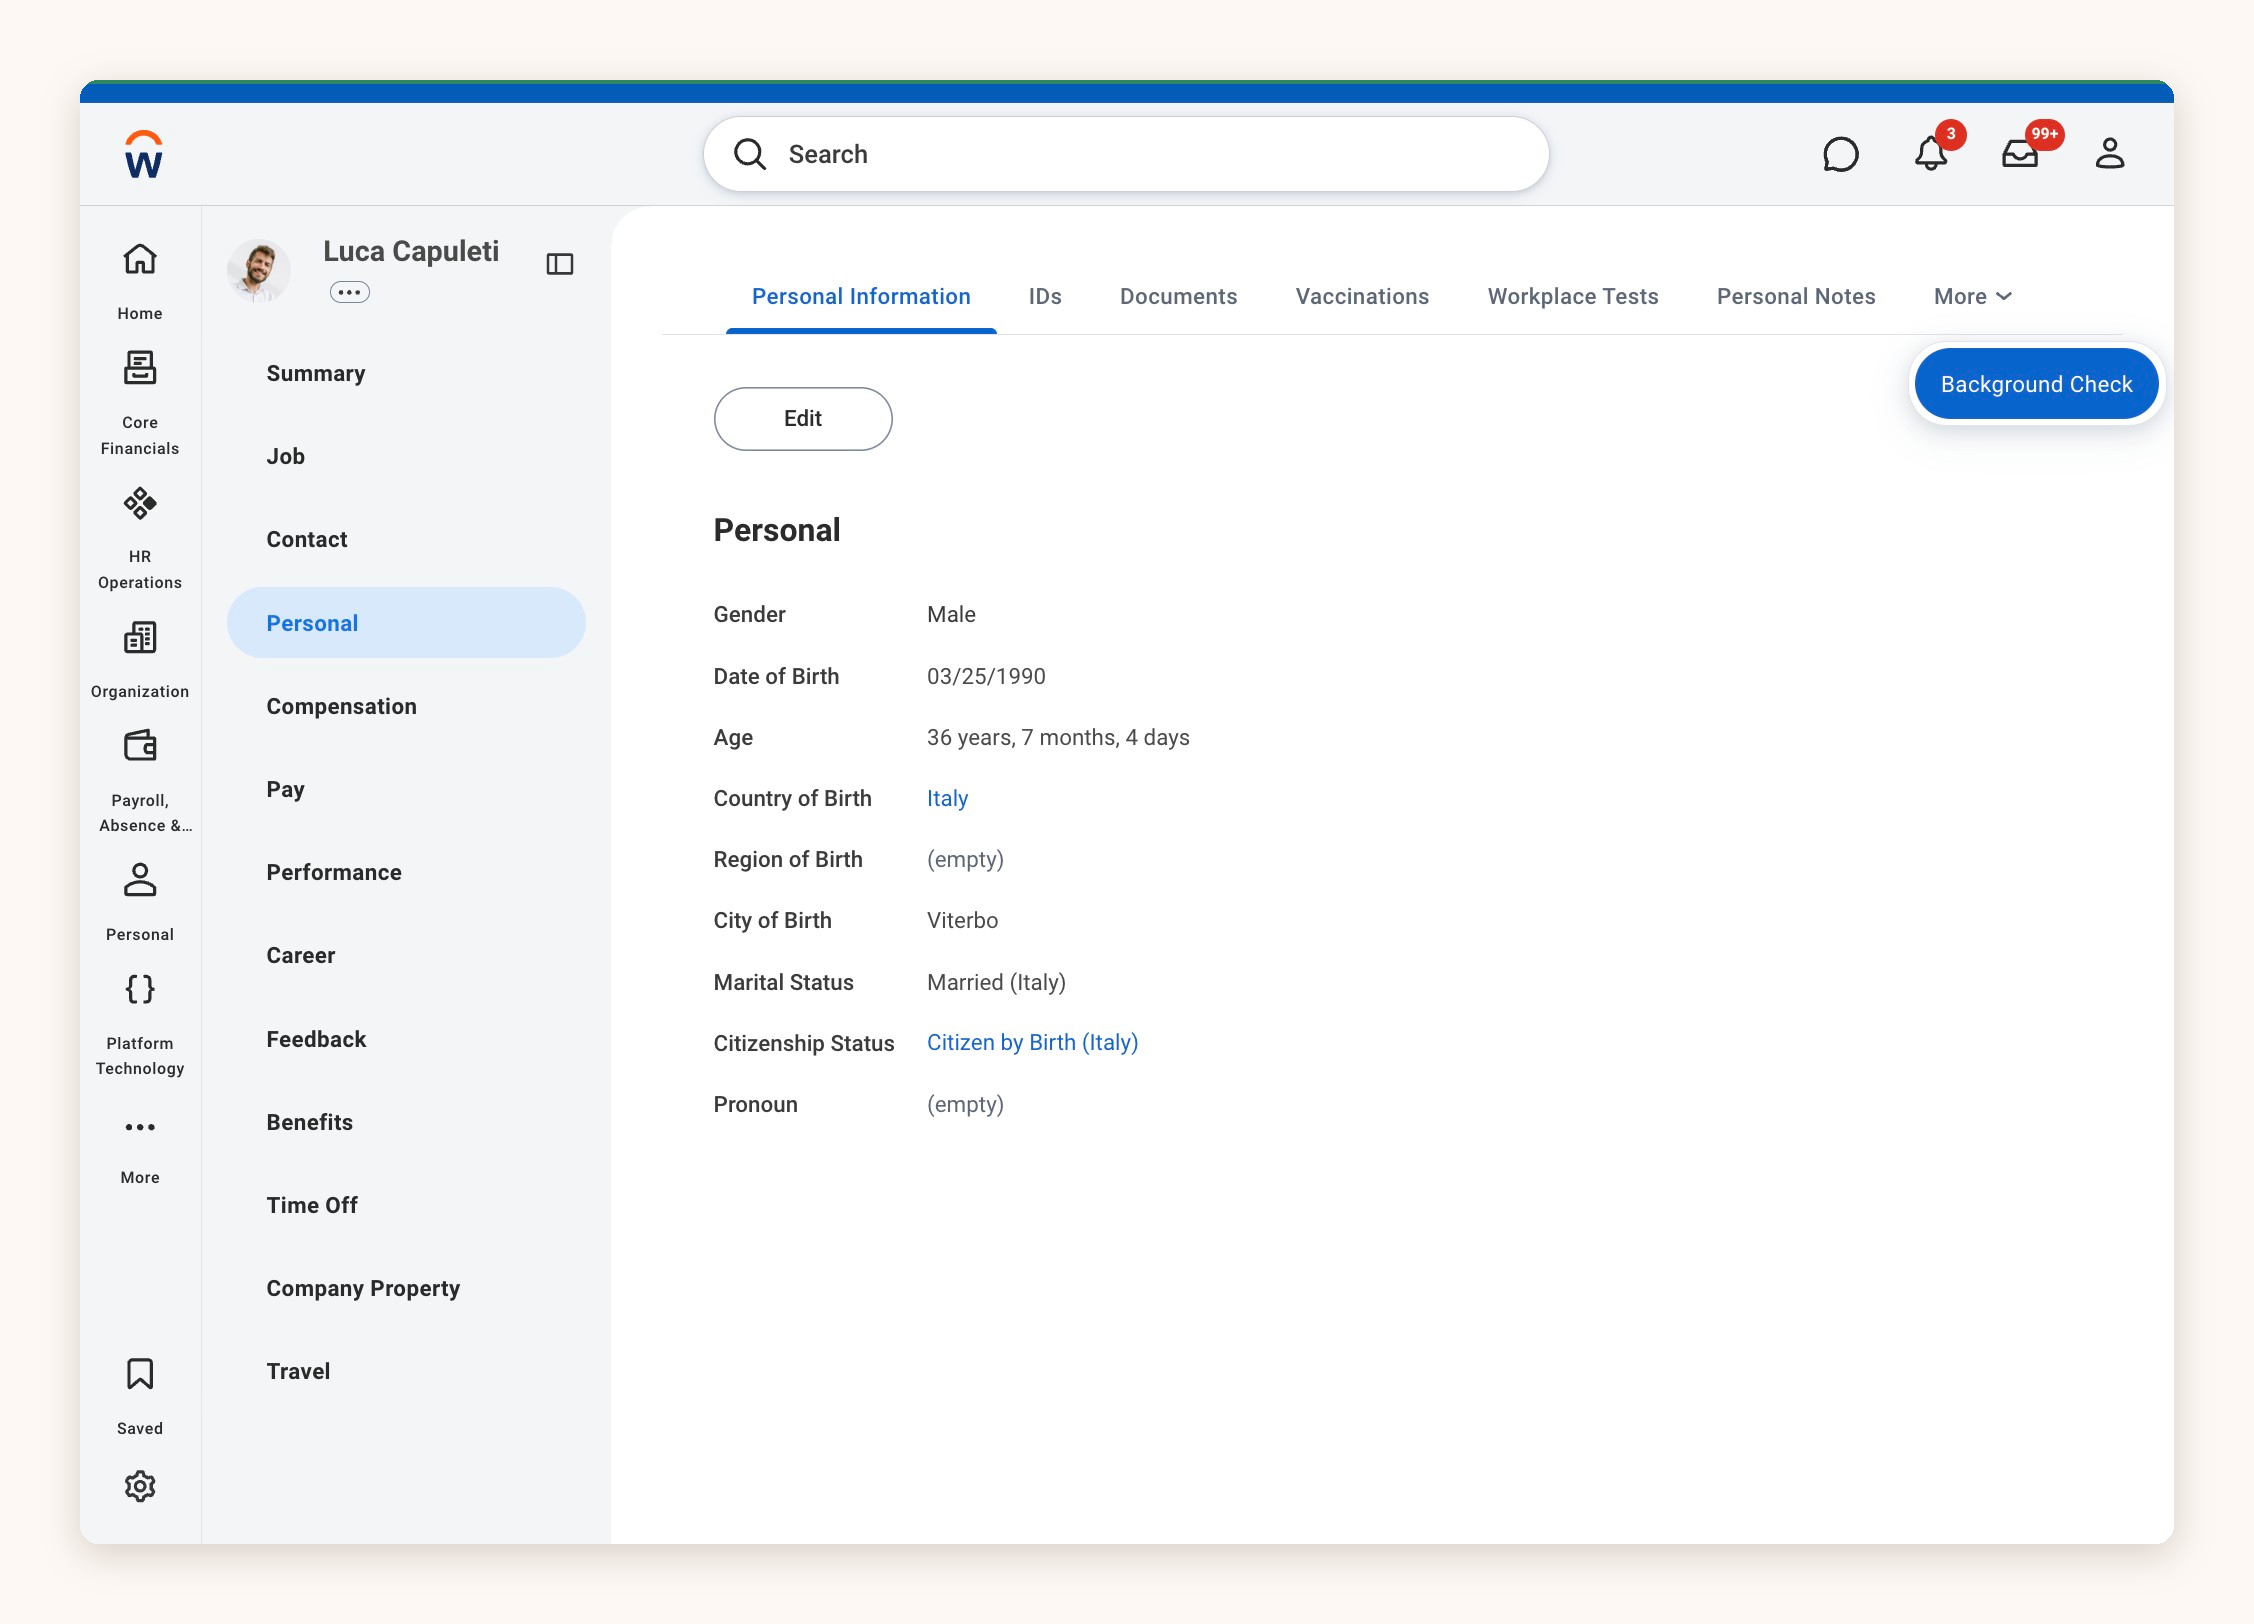
The **Background Check History** table lists each check run for the employee. For each one, you can see the status date, overall status, package name, package status and business process. The **Results URL** links to the full Zinc web result.
A check only appears here once you've submitted the **Select Background Check Overall Status** task.
## Opening the Report PDF
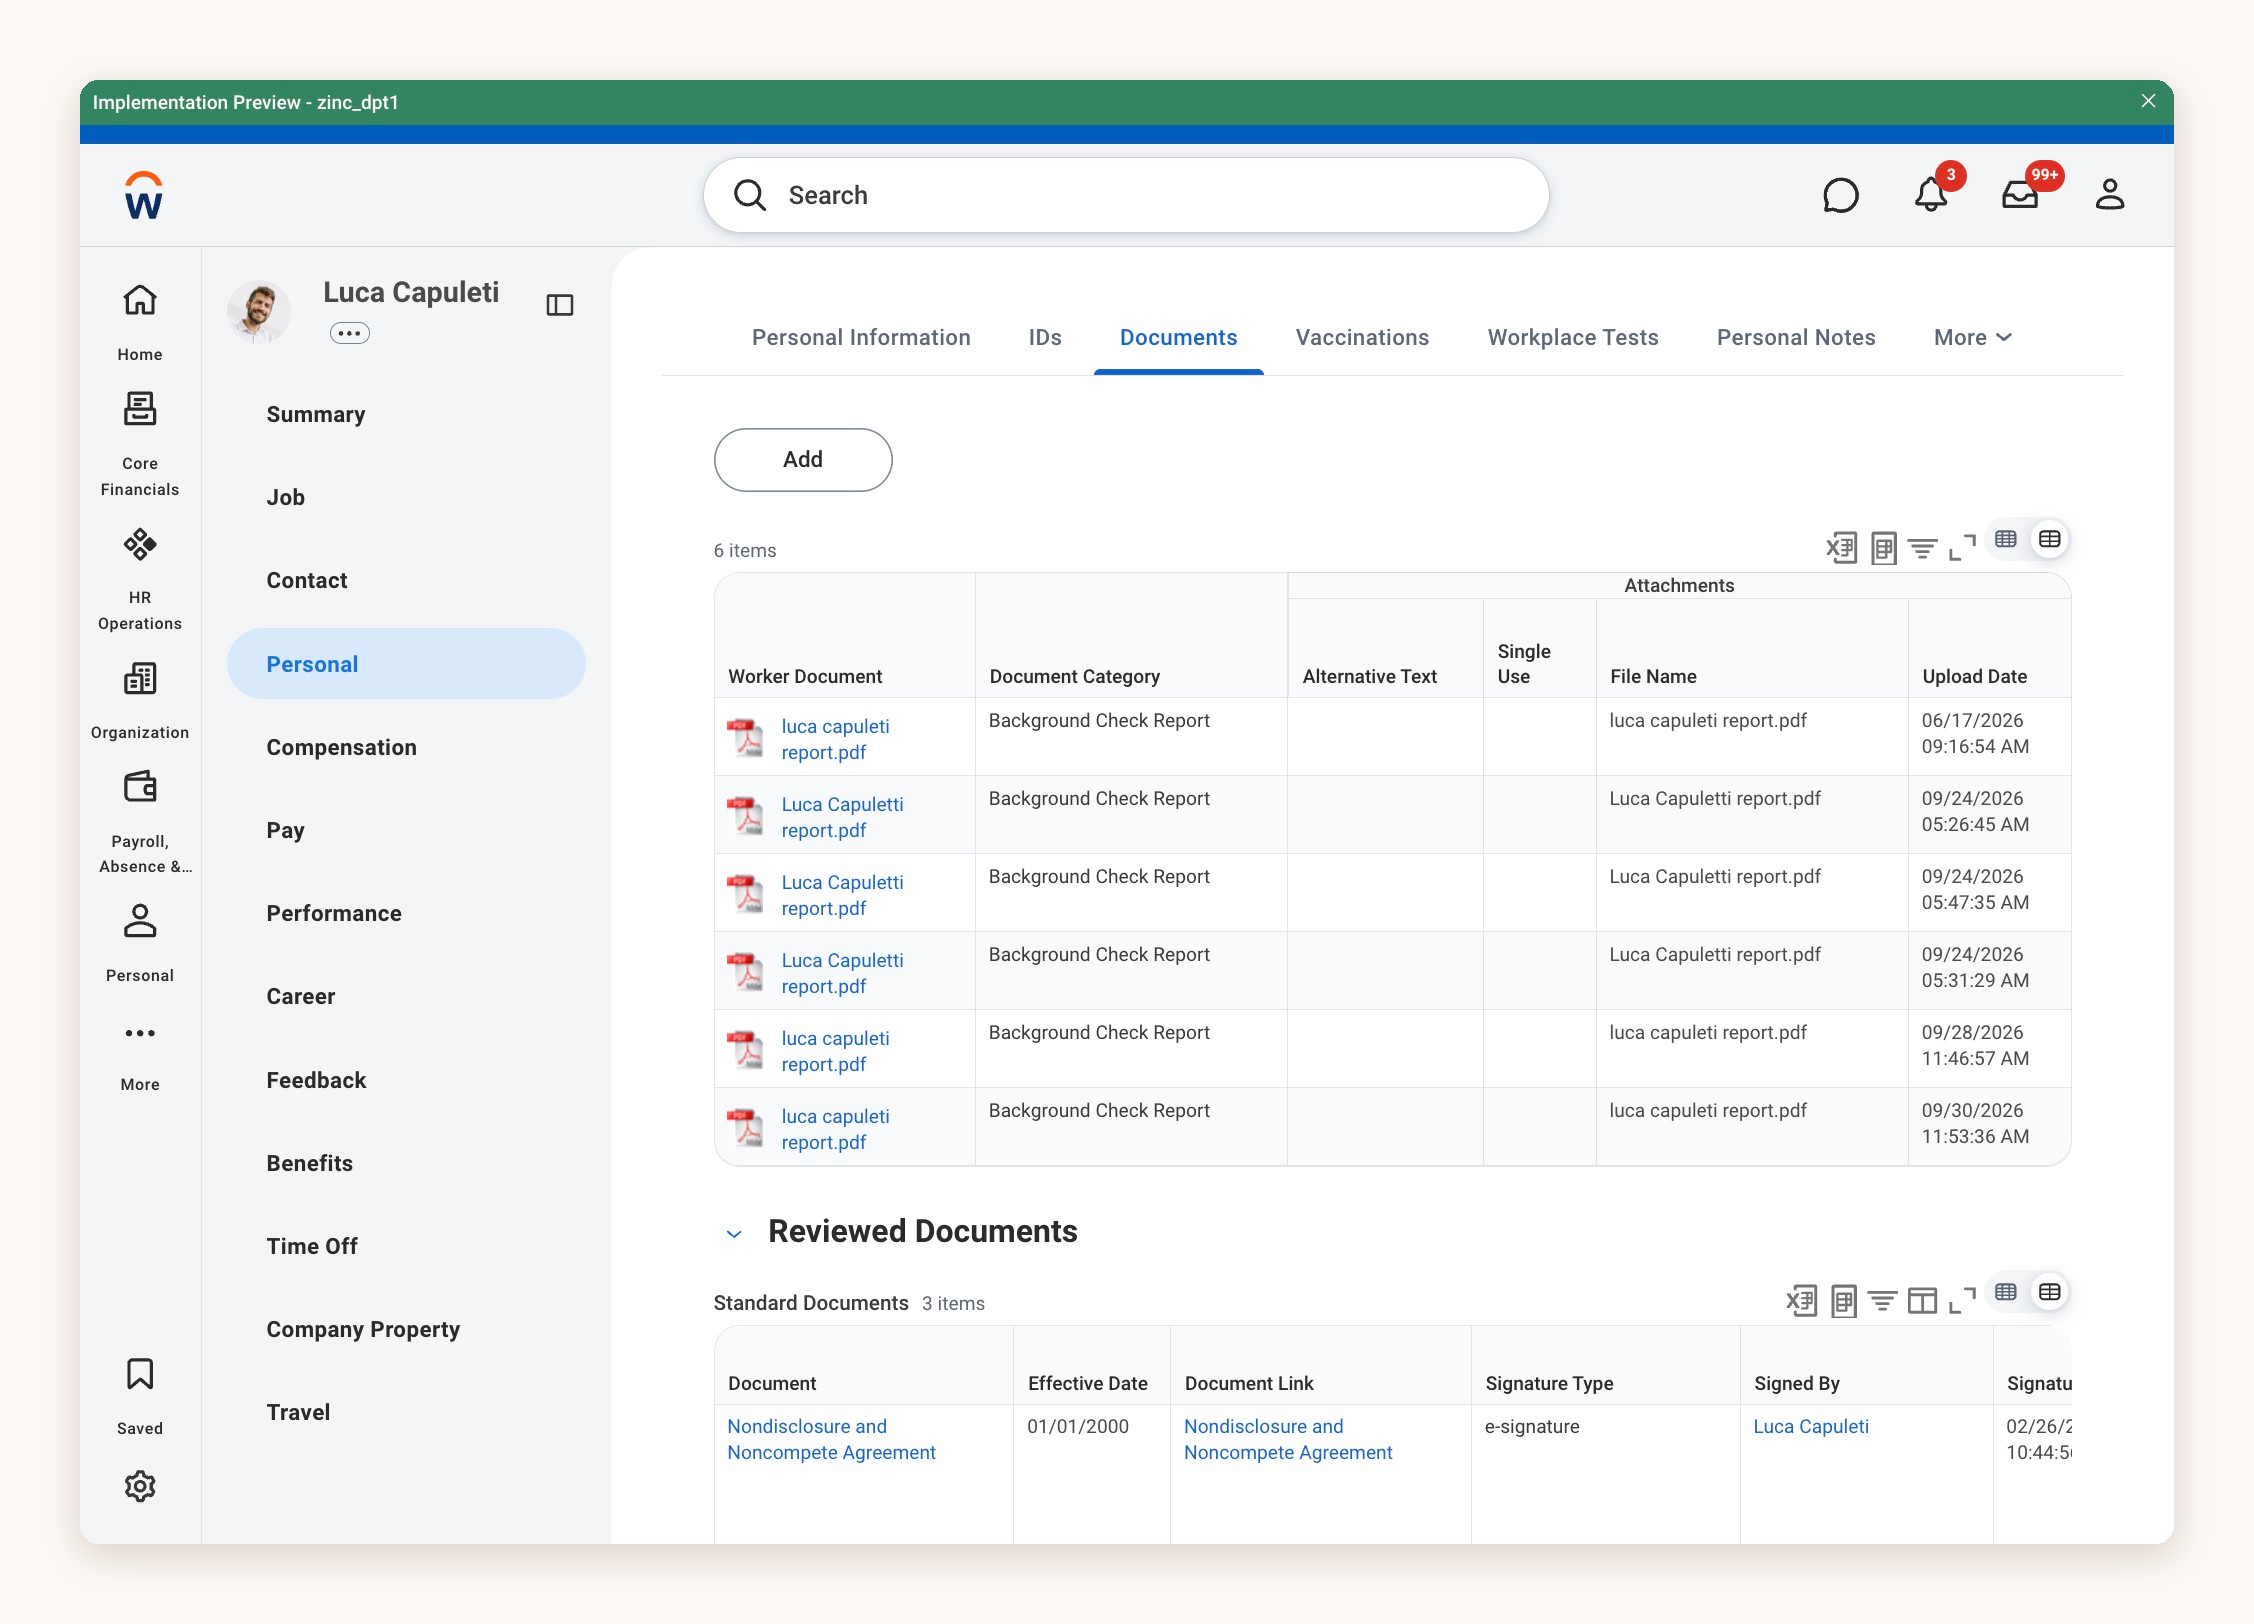
5. Select the **Documents** tab.
6. In the **Worker Document** table, click the report you want. Each Zinc report has the category **Background Check Report,** and the table shows its file name and upload date.
## Seeing the Individual Checks
**To see the status of each check in a package, use either of these routes.**
### Option A: **From the Status Summary**
1. Open the **Worker Background Check Status Summary** task.
2. Select the number under **Total** for the relevant **Supervisory Organisation.**
3. From the pop-over, select the relevant **Background Check Business Process.**
4. Select the **Details** tab to see each check's status.
### Option B: **From the Employee's Profile**
1. Open the employee's profile.
2. Select **Actions.**
3. Choose **Start Background Check** from the pop-over menu.
4. Select the **Details** tab to see each check's status.
##Where do I find any additional data?
If you've asked Zinc to send back additional data, you'll find it on the employee's profile. Select **Personal**, open the **More** menu on the tab row, then choose **Additional data.**