For the complete documentation index, see llms.txt
For the complete documentation index, see llms.txt
Complete a Bulk Upload on Zinc
Ever wish you could just click a button and request checks to a list full of candidates? Well, you can (almost) do this with our Bulk Upload feature on Zinc to request checks to multiple candidates within the same package!
This is only available for Admins and Recruiters to do, so if you are a Viewer in Zinc, please have another member of your organisation complete this process.
Here's a step by step guide on how to use this feature.
### Step 1: Find the Bulk Upload area
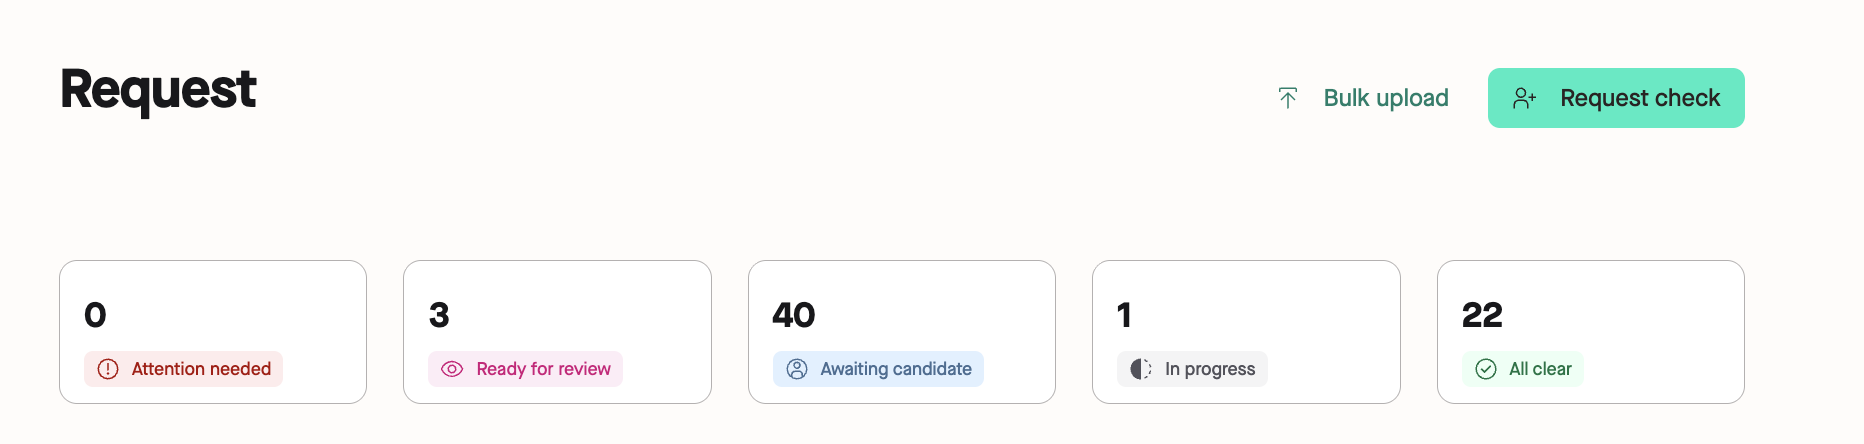
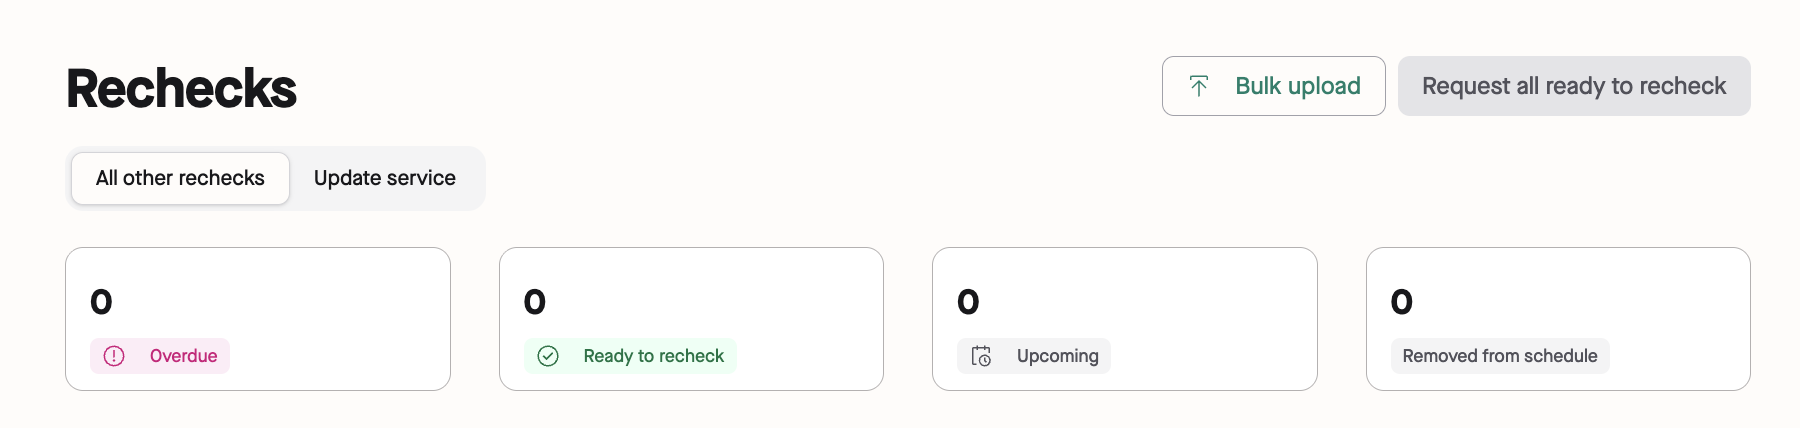
You can find the area to complete a bulk upload on either the [Request page](https://app.zincwork.com/recruit) or on the [Rechecks page](https://app.zincwork.com/rechecks) on Zinc in the top right corner of the page.
- If you are doing a bulk upload on a one-off basis, use the **Request** page.
- If you are uploading candidates to add them to a recheck cycle (e.g. every 3 months), use the **Rechecks** page.
### Step 2: Select your package for the upload
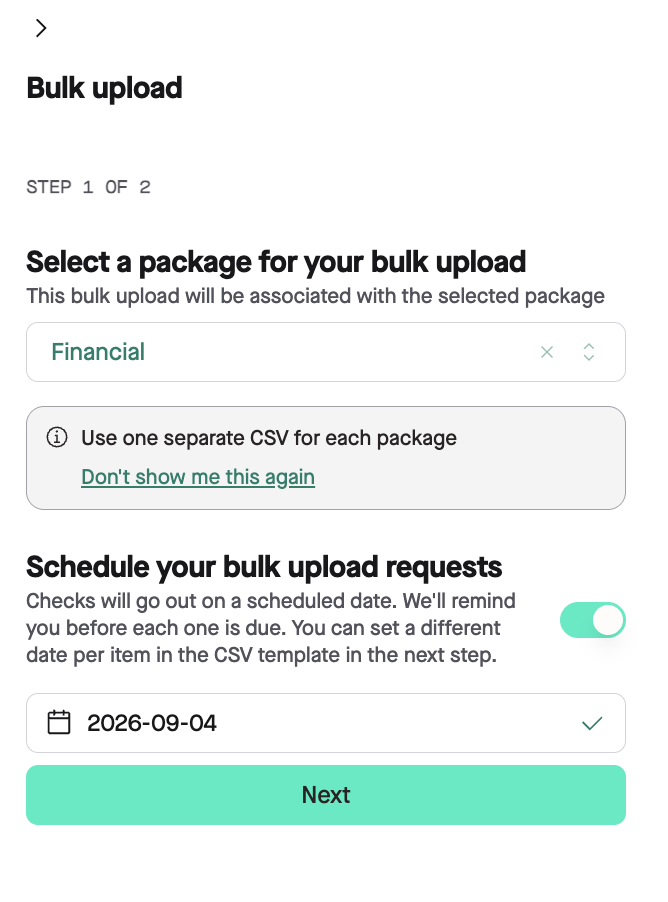
Once you click on **Bulk Upload**, a side panel will open up with steps shown on screen.
You first need to select your package for your bulk upload. This means your bulk upload will be associated with that specific package.
It's important to note that you have to use 1 separate CSV file for each package you would like to do a bulk upload for.
Additionally, you cannot complete a bulk upload for candidates that will be doing a **CV check**. This needs to be requested on an individual basis.
Finally, you can pick if you'd like to schedule this upload.
Scheduling checks means you can bulk upload your list of candidates which can be checked a few days, weeks, months, years from now. You will be reminded by email a week before it is due to send out these requests when the time comes and a reminder to send out these requests once the date has passed.
You can also set a different date for each individual in the CSV template in the next step.

### Step 3: Completing the CSV
After you click **Next**, you will be taken to the next step in the process where you can download the template and upload your candidates.
We provide you with a CSV template for your convenience and to show you exactly what needs to be provided in your upload. Please make sure your CSV upload is in the format of the template provided for a successful upload.
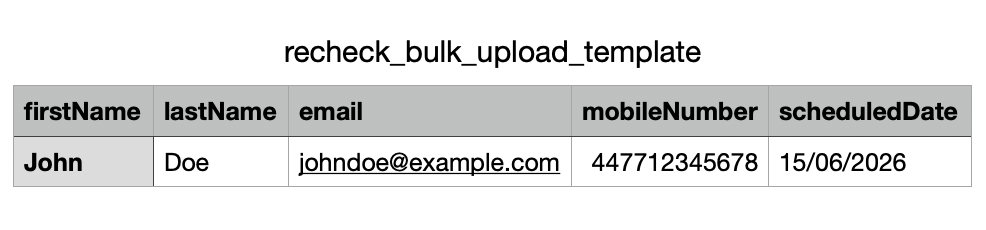
On your document, we require the candidate's first name, last name, and their email address with their mobile phone number and scheduled date being optional. The schedule date column allows you to customise when individual items are sent; you can leave this blank to use your step 1 date instead. We currently only support up to 1000 candidates per CSV upload so you may need to make multiple documents depending on the number of candidates you are uploading.
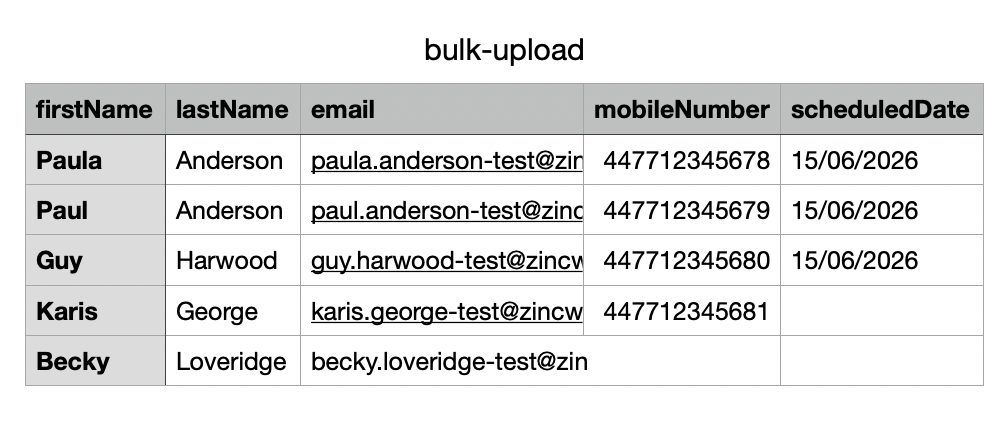
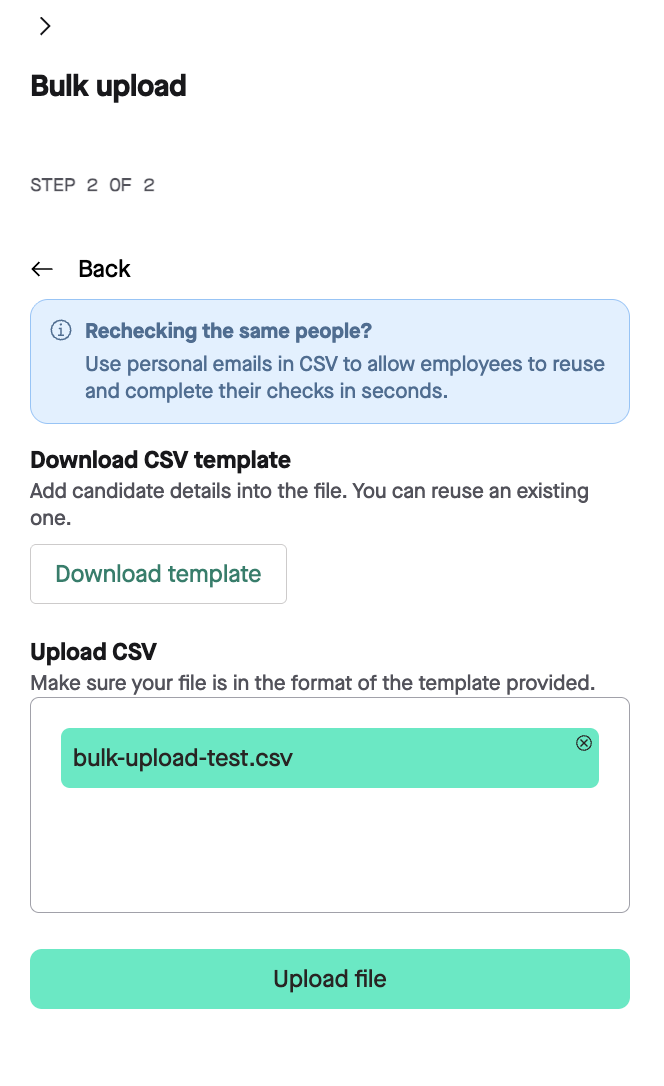
Once you have your file ready, upload your CSV file where indicated. We can only support CSV files under 5MB and with up to 1000 candidates per upload so just double check it meets those requirements.
Click **Upload file** to add those candidates into Zinc.
### Step 4: Request those checks
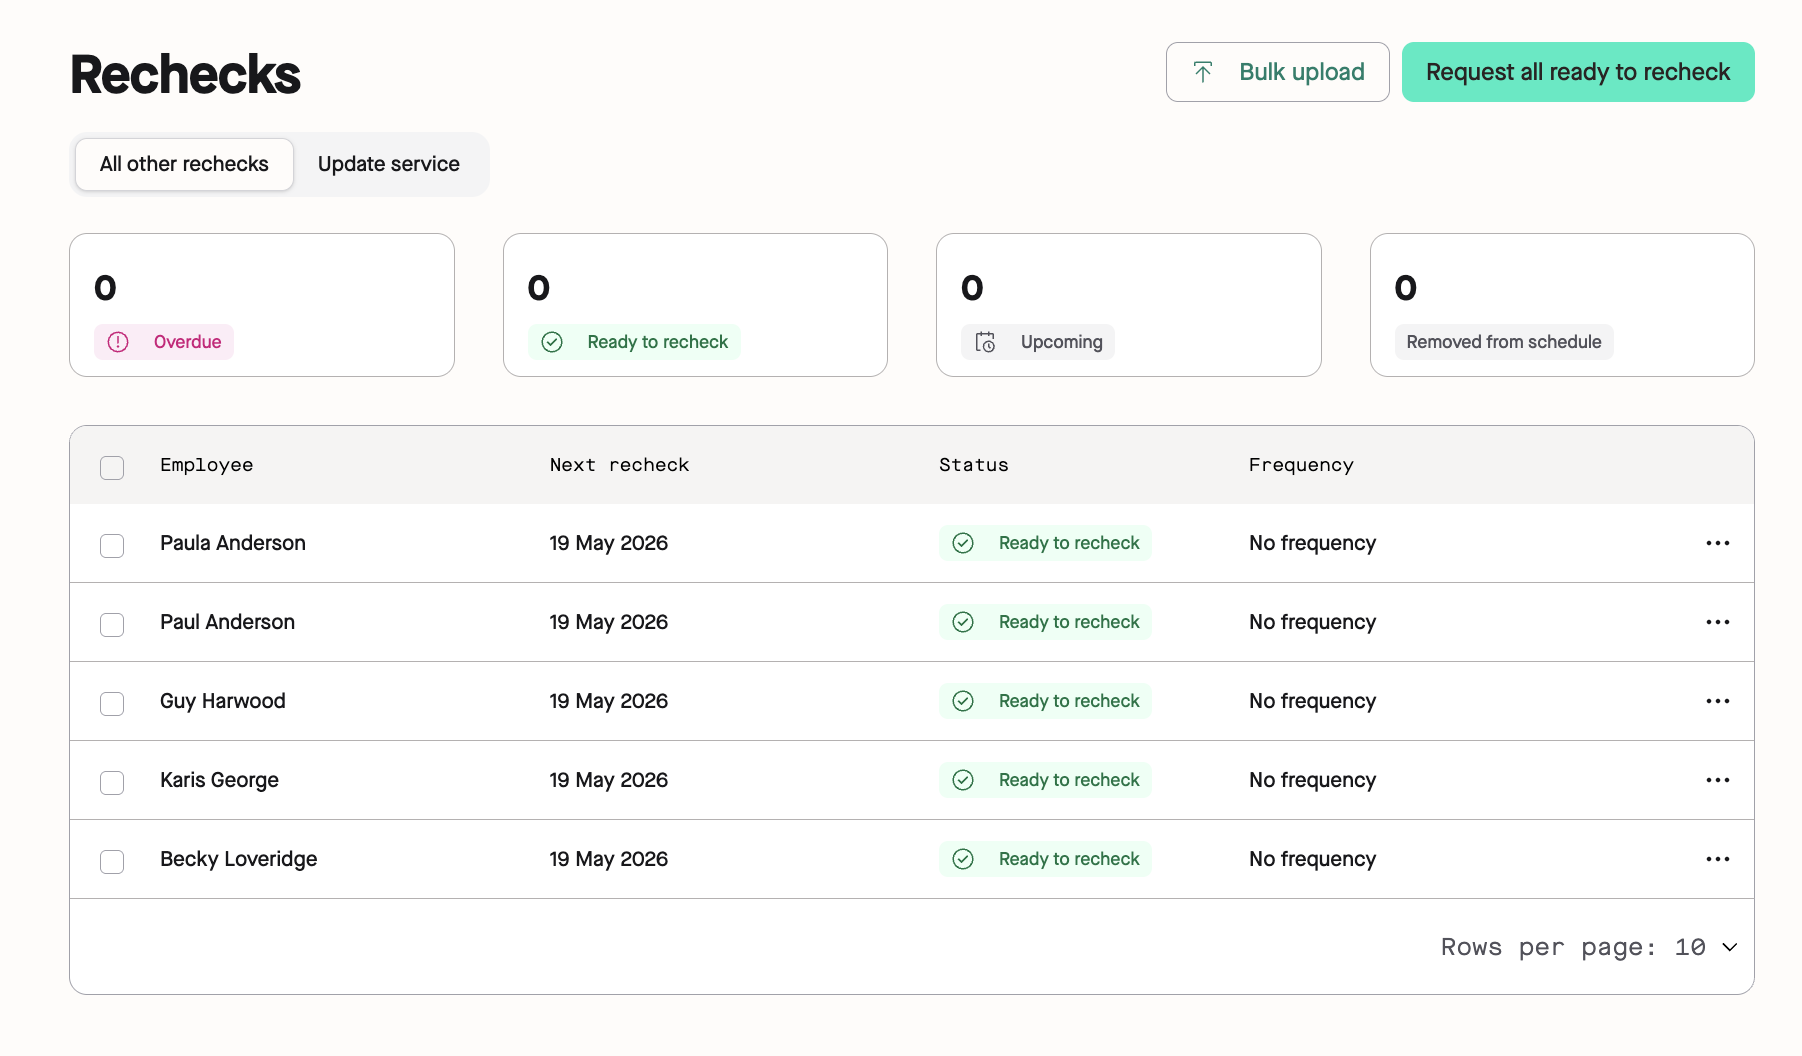
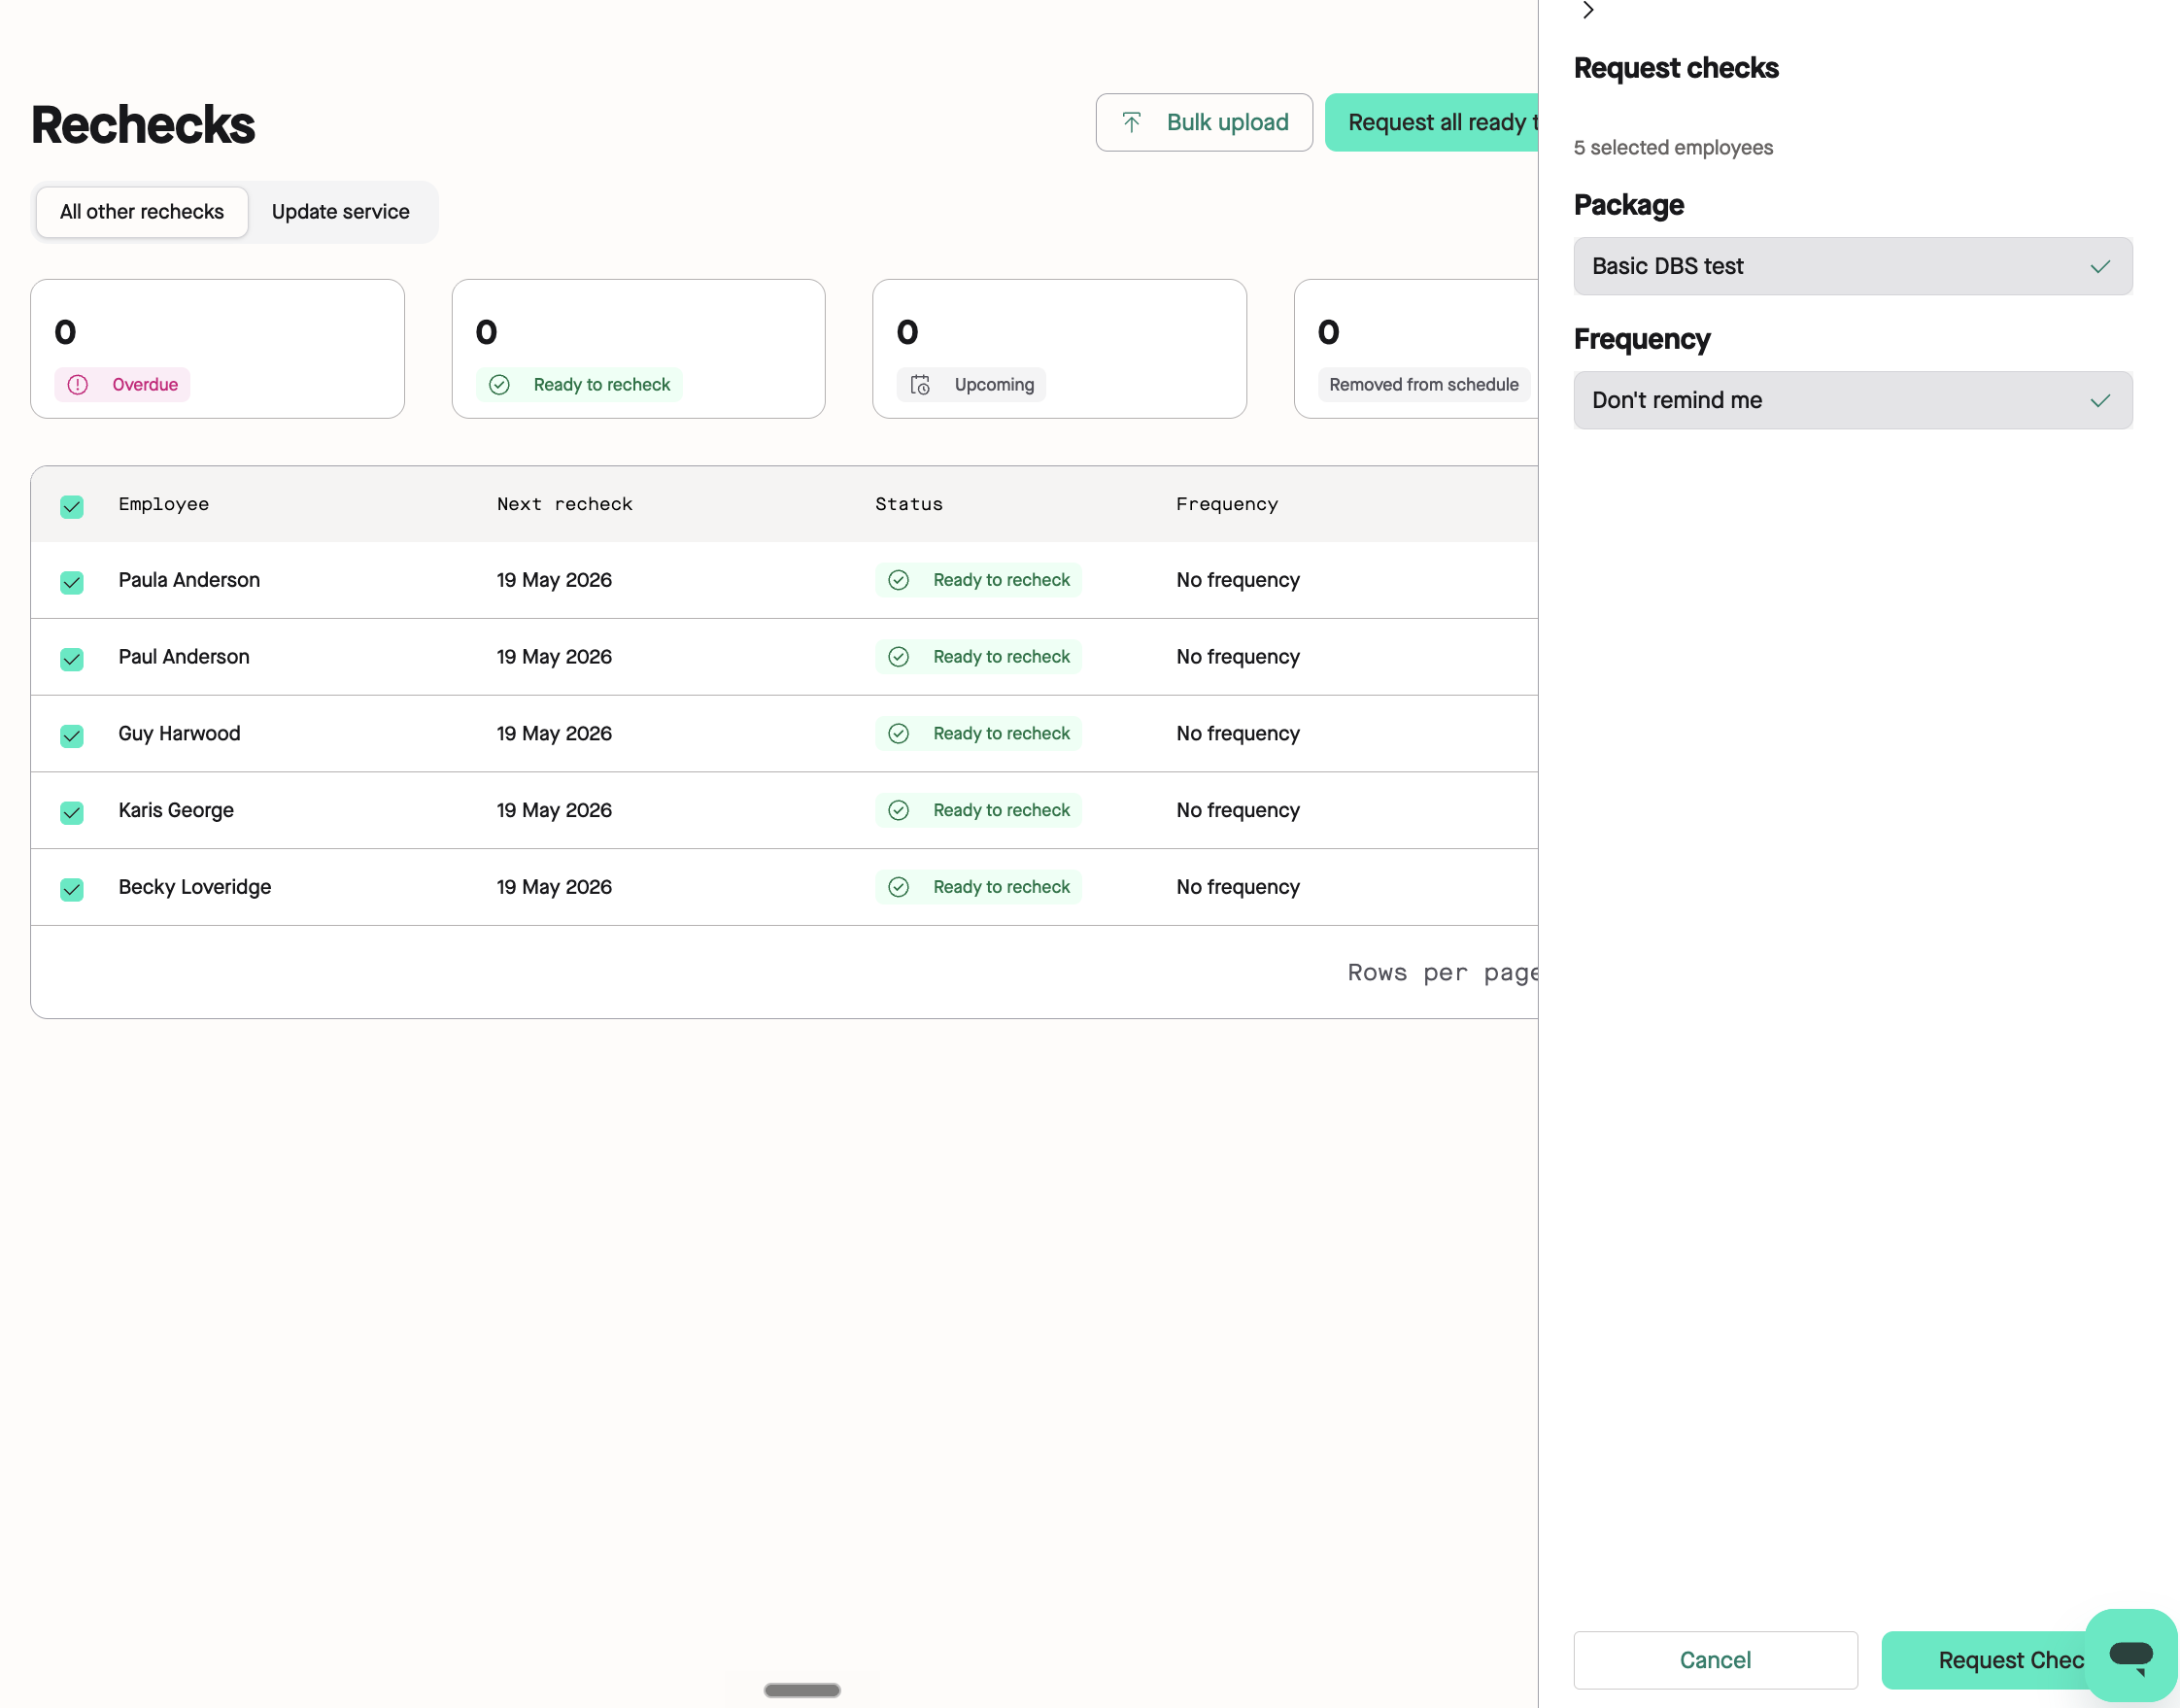
As soon as you have uploaded that file, you should see those candidates within your **Recheck** page on Zinc **even if you are not doing a Recheck** with a status such as:
- **Ready to recheck** — the checks have not been requested yet.
- **Upcoming** — they are not requested yet and they are scheduled to remind you to request those checks on the date you selected.
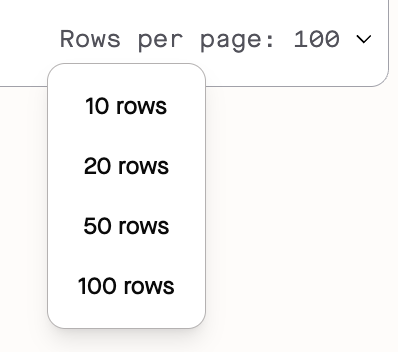
Quick tip: If you can't see everyone, you can adjust the view in the bottom right corner so you can see up to 100 candidates on one page!
If you are ready to have candidates start working on their checks:
- To request checks for everyone who is ready, click **Request all ready to recheck**.
- To request checks for specific candidates, tick the box next to their names (or click **Select All**), then select **Request Checks** at the bottom of the page where prompted.
A side panel will open where you can review the package that you are using for those selected candidates and what frequency you selected for rechecks if you selected a frequency for rechecks.
After doing this, just click **Request Checks** and those selected candidates will have check requests sent to them automatically.
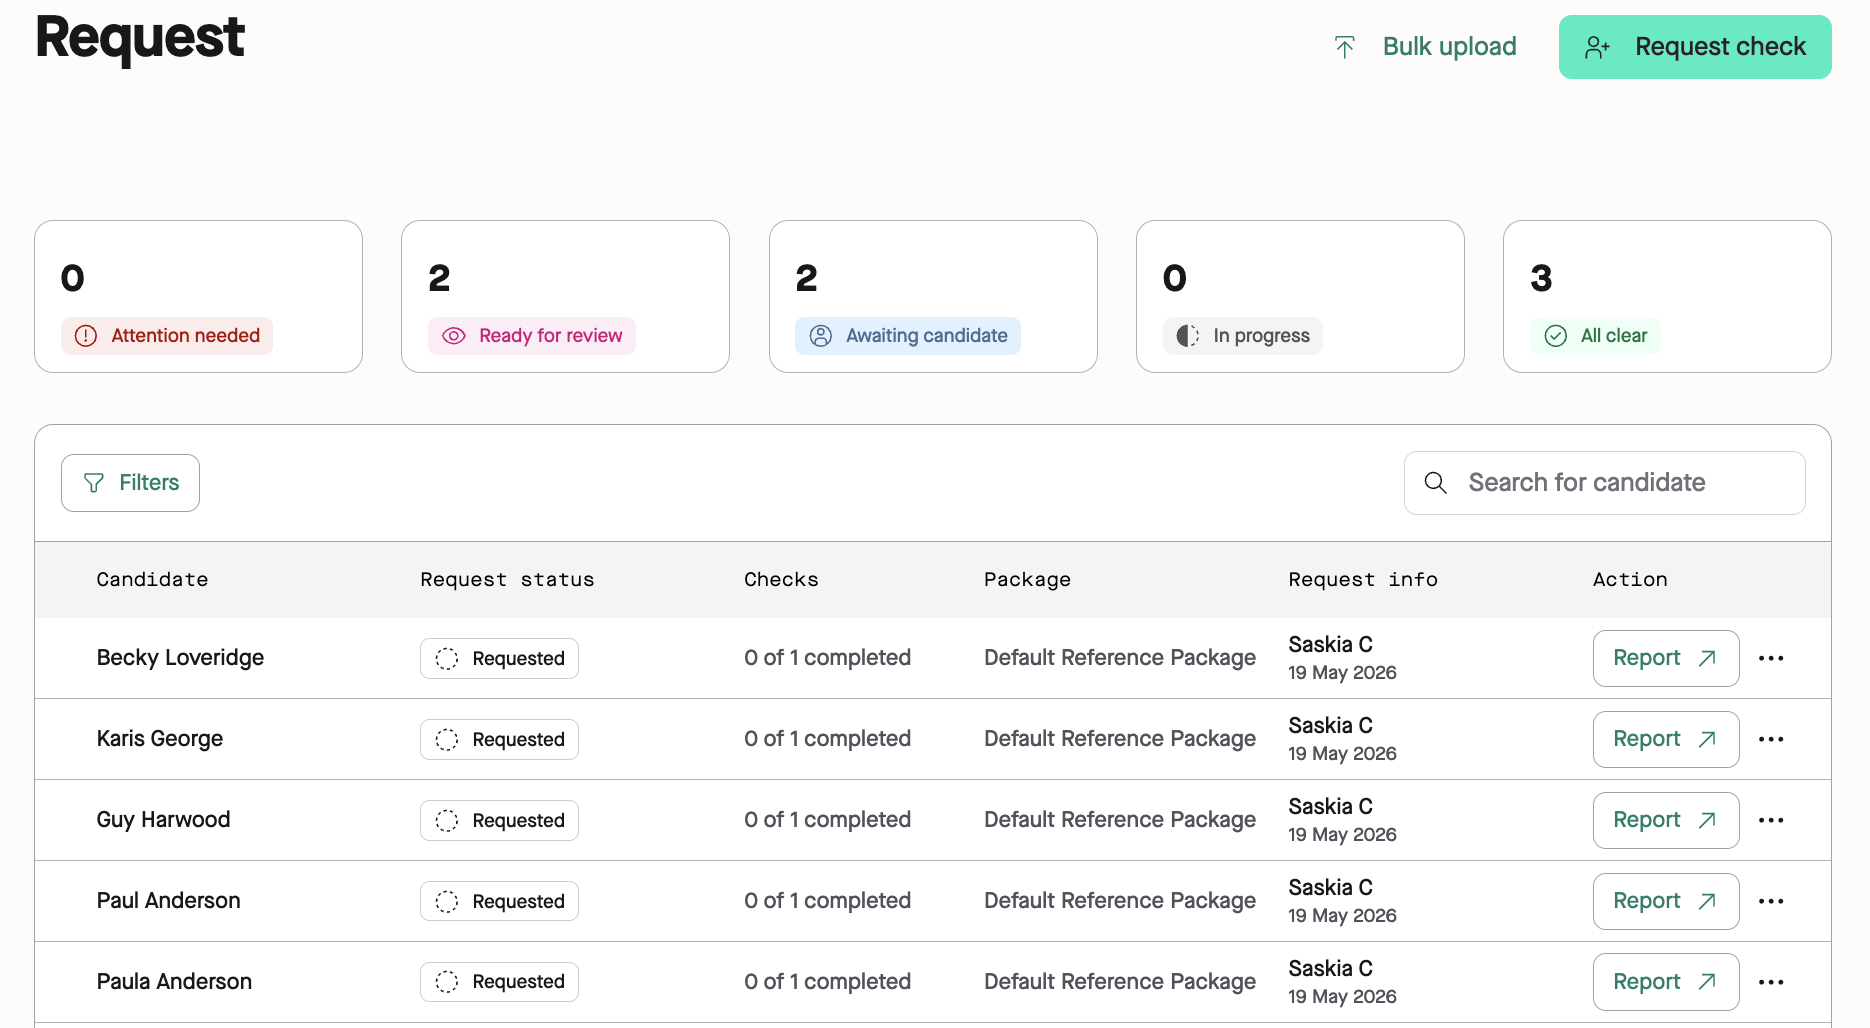
To check on those requests, just head back to your Request page and you will see those candidates in the **Requested** section on your Dashboard.
If you've scheduled candidates to be checked in the future, our system will remind you when it's time to send out those requests. Just wait for that message and then follow the steps here to request those checks.
If you have anyone leave the process that's been scheduled to receive check requests, you can remove them by selecting the candidates and clicking **Remove** to archive those candidates.
Once those requests are sent, you are all done and you can keep up to date with what is happening with those checks on the Request dashboard.